
Maximum Density – How to Place Your HQs as Close as Possible
Less space. Faster reinforcements. More trouble for the enemy!
Welcome back to lunA toOnS, where Albie has discovered that sometimes the best way to protect your fellow Lunatics is to get really, really close to them.
No. Not THAT close.
Today, we’re talking about maximum-density HQ placement: a simple but highly effective way to organize our alliance hive, improve reinforcement times, and make life considerably more difficult for enemy attackers.
Why Maximum Density Matters
In Last Z, the distance between HQs can make a huge difference during battles. When an alliance member comes under attack, every second counts.
If your HQs are spread across a large area, reinforcements need more time to reach their destination. That delay can be the difference between successfully defending a teammate and watching their HQ go up in flames.
By placing our HQs directly next to each other, we reduce the distance that reinforcement troops need to travel.
But there’s another important advantage: we minimize the available space for enemy teleportation inside our hive.
The tighter our formation, the fewer opportunities an enemy has to find an opening between our HQs.
Step 1 – Place Your First HQ
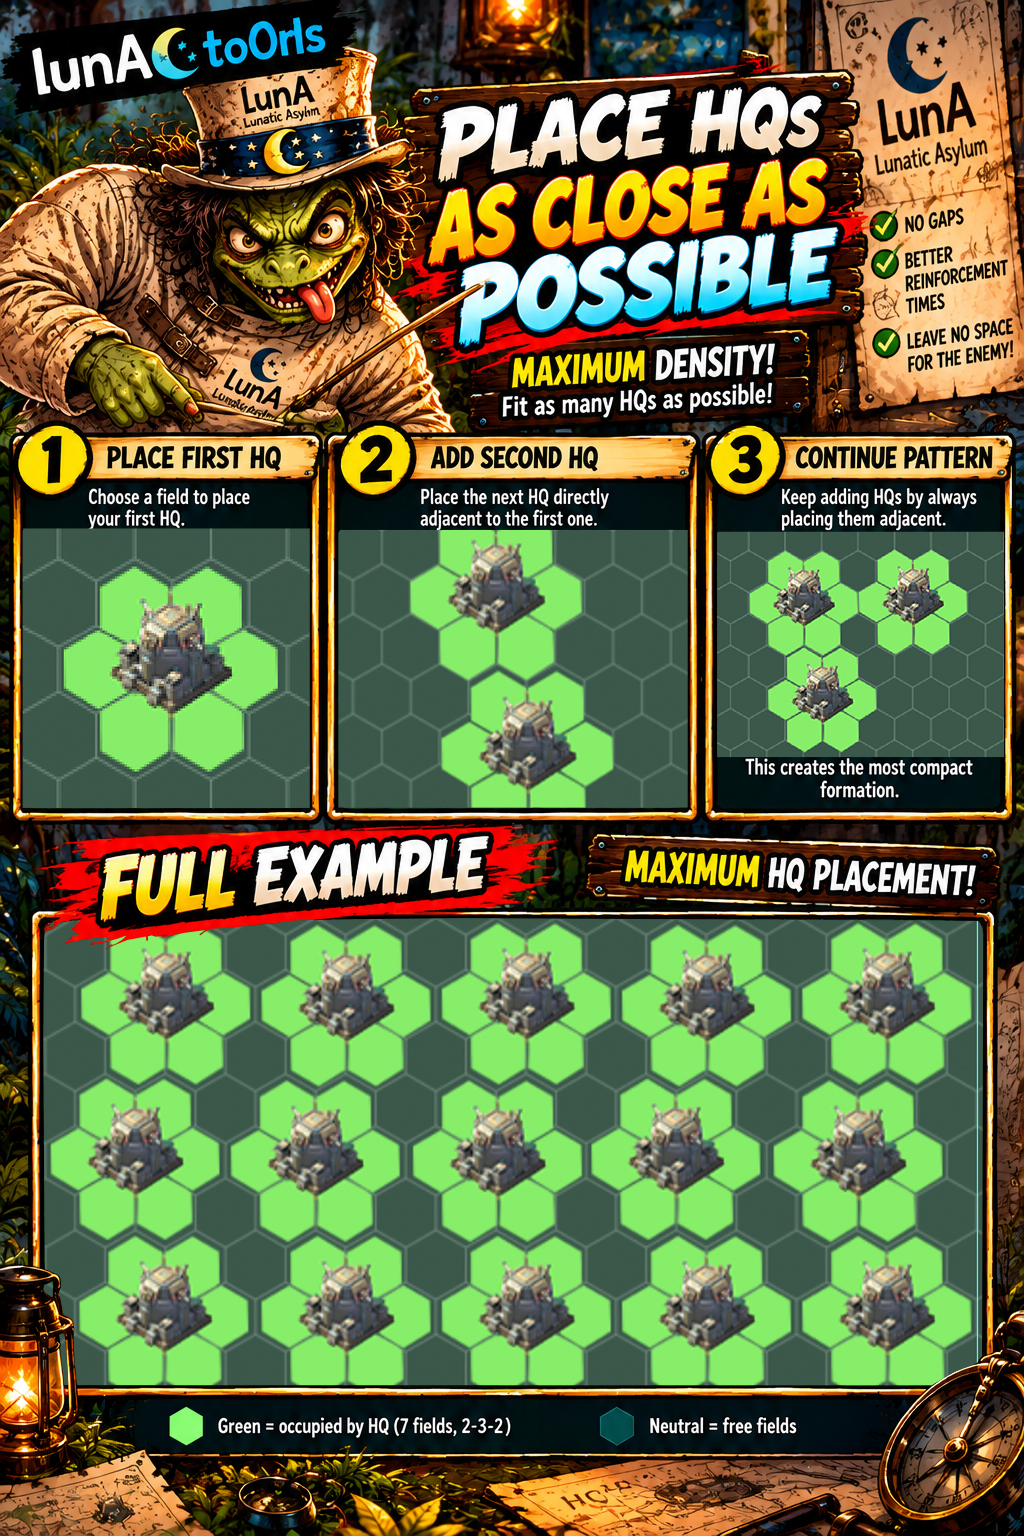
Every HQ occupies exactly seven hexagonal fields, arranged in a 2–3–2 pattern.
Start by choosing a suitable position for your first HQ. This will become the reference point for the rest of the formation.
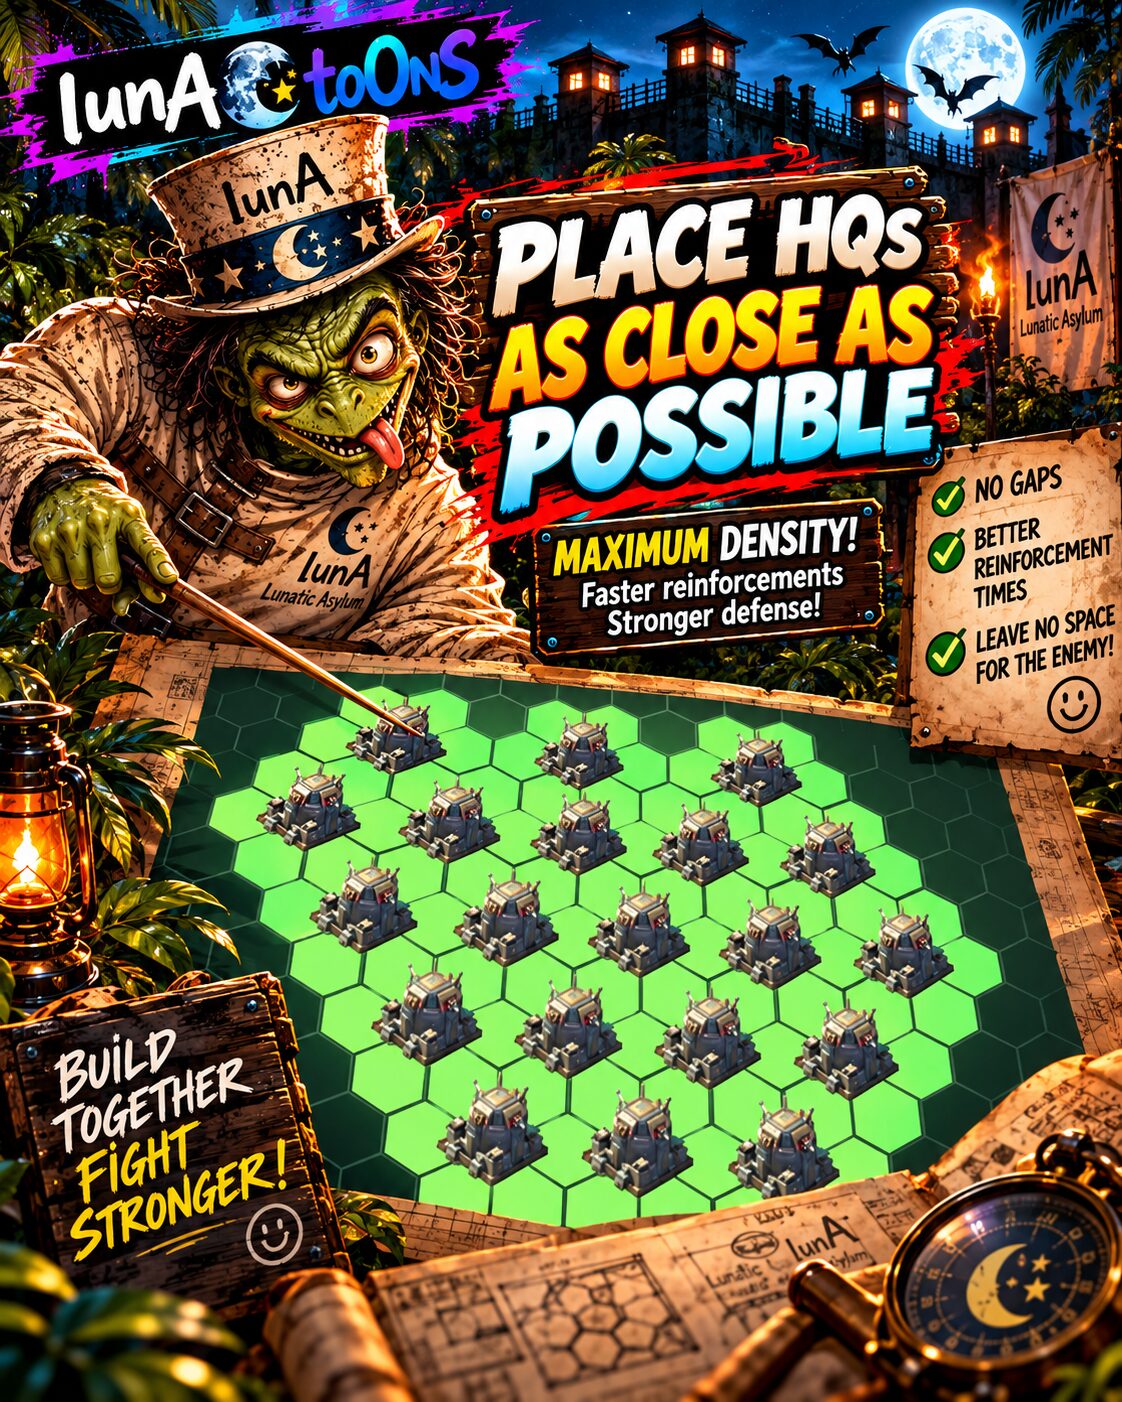
Pay attention to the hexagonal grid. Our infographic highlights the occupied fields in bright green so you can see exactly how much space each HQ requires.
Step 2 – Attach the Second HQ
Now comes the important part.
Place your second HQ directly adjacent to the first one, without leaving an unnecessary gap.
You can extend the formation either horizontally or vertically, as shown in the examples.
The objective is always the same: place the occupied HQ areas as close together as the game allows.
Don’t leave additional fields between the HQs. Every unnecessary gap wastes space and may create an opportunity for enemy players.
Step 3 – Continue the Pattern
Once the first two HQs are correctly positioned, continue extending the formation.
Follow the same hexagonal alignment and keep placing HQs directly adjacent to the existing ones.
As the hive grows, the HQs form a compact, repeating pattern.
The full example in our infographic shows how this arrangement can be extended across a much larger area while maintaining a consistent structure.
Instead of everyone choosing a random location, we build one coordinated formation.
And yes, Albie, that means you can’t just teleport wherever your tongue happens to point.
The Tactical Advantage: Faster Reinforcements
The biggest practical benefit of a compact hive is shorter reinforcement travel distances.
When a member is attacked, nearby allies can send their troops much more quickly than they could from a widely scattered formation.
This allows the alliance to react faster, coordinate defensive support more efficiently, and reduce the time between an attack warning and the arrival of reinforcements.
Especially during intense battles, those saved seconds can be extremely valuable.
A compact hive helps turn individual HQs into a coordinated defensive network.
Make Life Difficult for Enemy Teleporters
A tightly packed hive also reduces the amount of free space between HQs.
Enemy players looking for a convenient teleportation position inside our formation may discover that there simply isn’t enough room for their HQ.
Instead, they have to search for an available position outside the packed area.
This can increase their travel distances and make surprise attacks from inside the hive more difficult.
Of course, the formation alone doesn’t make us invincible. Shields, active defenders, reinforcements, and good coordination are still essential.
But making the enemy’s job harder is always a good start.
Teamwork Makes the Formation Work
Maximum-density placement requires cooperation.
Every member should follow the established pattern and coordinate relocations with alliance leadership. Random gaps, misplaced HQs, or unnecessary empty spaces can compromise the overall layout.
If everyone follows the same grid, the hive can expand in an orderly and efficient way.
The infographic provides a visual reference for the correct placement and the final formation.
Maximum Density, Maximum Teamwork!
There are situations where spreading HQs strategically makes sense, especially when we want to control a large area and prevent enemies from teleporting close to important objectives.
But when the goal is to create a compact alliance hive, maximum density is the way to go.
Place HQs directly adjacent to each other, follow the hexagonal pattern, and keep the formation consistent.
The result is a tightly organized alliance with shorter reinforcement distances and fewer openings for unwanted visitors.
No unnecessary gaps. Faster reinforcements. Less room for the enemy.
And if a Whale comes knocking?
Well, at least he’ll have to find somewhere to park first.
— Albie, Chief of Uncomfortably Close Neighbors, lunA Lunatic Asylum